Unlocking the Magic of Homemade Eggnog: An Easy Creamy Recipe for All
There's something undeniably enchanting about a perfectly crafted glass of eggnog. It's the taste of winter holidays, cosy evenings, and festive celebrations all rolled into one rich, delightful sip. While store-bought versions certainly exist, nothing quite compares to the unparalleled depth of flavour and luxurious texture of a homemade
creamy eggnog recipe. Imagine it: thick, velvety, and bursting with the nuanced spices of the season.
Many believe making eggnog from scratch is a daunting task, but we're here to prove that achieving a sensational, easy
creamy eggnog recipe is not only possible but wonderfully straightforward. Even better, this versatile recipe can be tailored to be a comforting, kid-friendly treat or an elegant, spirited concoction perfect for adult gatherings. Say goodbye to the mundane and hello to your new favourite holiday tradition!
Why Homemade Eggnog Reigns Supreme (and So Easy!)
If you've ever thought eggnog wasn't for you, chances are you haven't experienced the magic of a truly homemade batch. The difference between mass-produced, often overly sweet, and thin store-bought options and a lovingly prepared homemade
creamy eggnog recipe is night and day.
Here's why taking a little extra time makes all the difference:
*
Unrivalled Freshness: You control every ingredient, ensuring peak freshness and quality. This translates directly into a superior taste that simply can't be replicated.
*
Superior Creaminess and Texture: Using fresh eggs, whole milk, and double cream guarantees an incredibly thick, smooth, and genuinely creamy texture. No artificial thickeners needed!
*
Customizable Flavour Profile: Adjust the sweetness, spice level, and the blend of spirits (if using) to perfectly suit your palate. Want more nutmeg? A hint of vanilla? It's all in your hands.
*
Impressive Factor: Serving homemade eggnog instantly elevates any gathering. Your guests will undoubtedly be impressed by the effort and exquisite taste.
*
It's Simpler Than You Think: While there are a few steps, none are overly complicated. The most time-consuming part is usually the chilling, which can be done overnight!
Crafting Your Perfect Creamy Eggnog: The Base Recipe
Our recipe focuses on a cooked method, often referred to as tempering, which ensures a safe and deliciously smooth base, especially if you're serving children or those with sensitivities to raw eggs. This approach eliminates any concerns while still delivering that coveted richness.
Ingredients You'll Need:
* 4 large free-range eggs, separated (you'll use yolks for the base, whites for texture later)
* 100g caster sugar
* 500ml whole milk
* 450ml double cream (heavy cream), divided into 300ml and 150ml portions
* 1/2 teaspoon freshly grated nutmeg, plus extra for garnish
* 1/4 teaspoon fine sea salt (enhances flavour)
* 1 teaspoon vanilla extract
Step-by-Step for a Silky Smooth Base:
1.
Whisk Yolks and Sugar: In a large, heatproof bowl, vigorously whisk the egg yolks and caster sugar together until the mixture is thick, pale yellow, and forms a ribbon when lifted with the whisk. This process lightens the yolks and dissolves the sugar, contributing to that irresistible creaminess.
2.
Warm the Dairy & Spices: In a medium saucepan, combine the whole milk, 300ml of the double cream, 1/2 teaspoon of grated nutmeg, and the pinch of salt. Heat over medium-high heat, stirring occasionally, until the mixture just reaches a gentle simmer. Do not boil.
3.
Temper the Eggs: This crucial step prevents the eggs from scrambling. Slowly ladle about 1/2 cup of the hot milk mixture into the whisked egg yolks, whisking constantly and vigorously. Continue to add the hot milk mixture, a small amount at a time, until you've incorporated about half of the warm liquid into the egg yolks. This gradually raises the temperature of the yolks.
4.
Return to Pan & Thicken: Pour the warmed egg yolk mixture back into the saucepan with the remaining hot milk mixture. Return the pan to medium-low heat and continue to whisk constantly for 2-4 minutes, or until the mixture thickens slightly. It should coat the back of a spoon. Do not allow it to boil. The mixture will continue to thicken as it cools.
5.
Add Vanilla & Chill: Remove the saucepan from the heat and stir in the vanilla extract. Pour the eggnog base into a clean bowl or jug. Cover tightly with plastic wrap, ensuring the wrap touches the surface of the eggnog to prevent a skin from forming. Refrigerate for at least 6 hours, or ideally overnight, for the best flavour and thickness. Store the egg whites in a separate, covered bowl in the fridge until ready to use. This lengthy chilling period is key to a truly thick, rich, and
creamy eggnog.
Spiked or Kid-Friendly: Tailoring Your Eggnog Experience
One of the greatest joys of a homemade
creamy eggnog recipe is its incredible adaptability. Whether you're hosting an adult holiday party or looking for a delightful non-alcoholic treat for the whole family, this recipe has you covered.
Elevating Your Eggnog: The Adult Twist
For those who enjoy a spirited kick, eggnog provides a fantastic canvas for various liquors. The high alcohol content helps to balance the sweetness, and the rich flavour profile complements a wide array of spirits.
*
When to Add Alcohol: Once your eggnog base has thoroughly chilled, stir in your chosen spirits. This ensures the alcohol's flavour isn't cooked off and provides a cleaner taste.
*
Recommended Spirits: Classic choices include Bourbon or whisky (known for their warming, vanilla notes), dark rum (adding a rich, molasses-like depth), and brandy (offering a sophisticated fruitiness). You can use a single spirit or a combination.
*
Suggested Quantities: Start with 150ml Bourbon or whisky, 50ml dark rum, and 50ml brandy for the quantities listed in our base recipe. You can adjust this to your personal preference, adding more or less to taste. Remember, it's easier to add more than to take away!
*
Serving Suggestions: Pour into festive glasses, sprinkle with fresh nutmeg, and consider a cinnamon stick for garnish. This delicious rendition makes for a fantastic holiday cocktail. For more ideas on infusing your eggnog with holiday cheer, check out our guide on
Homemade Creamy Eggnog: Your Best Holiday Drink Recipe.
Delightful & Delicious: The Kid-Friendly Option
Even without alcohol, this homemade
creamy eggnog recipe is a showstopper. The rich dairy, sweet eggs, and aromatic spices create a comforting and indulgent drink that children and adults alike will adore.
*
Pure & Simple: Simply omit the alcohol entirely. The base recipe, with its careful cooking process, is perfectly safe and delicious as is.
*
Fun Garnishes: Make it extra special for the little ones! Top with a dollop of whipped cream, a sprinkle of cinnamon, chocolate shavings, or even a mini marshmallow for a truly festive touch.
*
Additions for Flavour: A tiny splash of almond extract or a scraped vanilla bean can add another layer of aroma without alcohol.
Serving Your Perfect Creamy Eggnog: The Finishing Touches
Just before you're ready to serve your perfectly chilled eggnog, it's time to add the final elements that contribute to its luxurious texture and beautiful presentation.
1.
Whip Egg Whites: In a clean, dry bowl, whisk the reserved egg whites until they form stiff but not dry peaks. Be gentle – you're aiming for volume and lightness.
2.
Whip Remaining Cream: In a separate bowl, whisk the remaining 150ml of double cream until it forms soft peaks.
3.
Fold Gently: First, gently fold the whipped egg whites into the chilled eggnog base. Then, gently fold in the whipped cream. Use a large metal whisk or spatula to gently combine, making sure to break up any larger clumps of egg white, but being careful not to deflate the mixture. This step adds incredible lightness and fluffiness, enhancing the "creamy" aspect without making it heavy.
4.
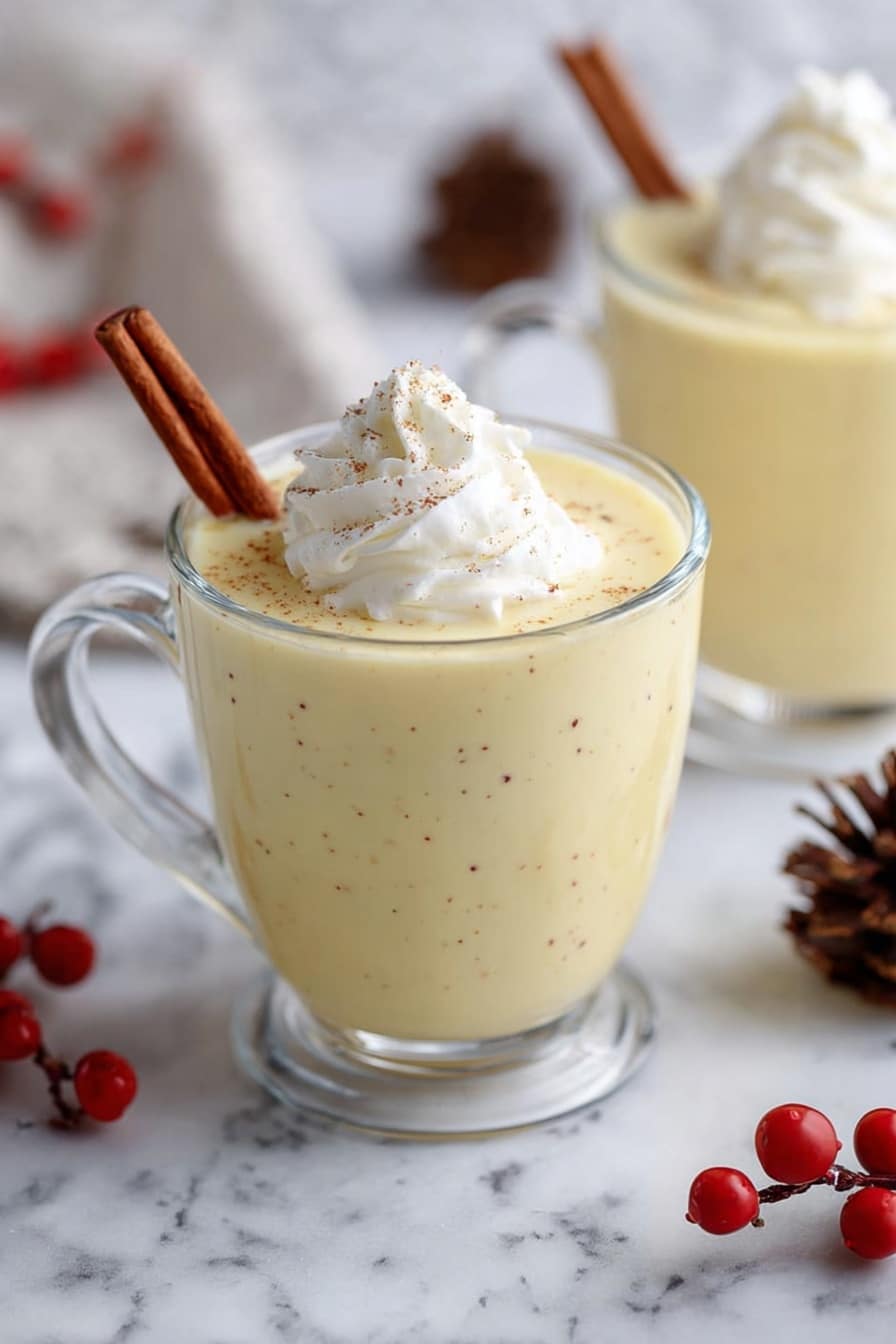
Serve Cold: Pour the finished eggnog into a large jug or punch bowl. Serve immediately, chilled, in individual glasses. A final generous sprinkle of freshly grated nutmeg is essential for both aroma and visual appeal. You can also add a cinnamon stick or a dollop of extra whipped cream.
Tips for the Ultimate Creamy Eggnog (and Safe Sipping!)
*
Fresh is Best: Always use fresh, free-range eggs for the best flavour and safety. Freshly grated nutmeg is also infinitely superior to pre-ground.
*
Chilling is Key: Don't rush the chilling process. The longer it chills, the thicker the eggnog will become, and the more the flavours will meld and deepen. Overnight is truly recommended for a deeply satisfying,
creamy eggnog recipe.
*
Embrace Tempering: The tempering method (cooking the eggs gently) is highly recommended for safety. If you prefer the traditional raw egg method, please ensure you use pasteurized eggs and understand the inherent risks.
*
Garnish Generously: A final dusting of nutmeg isn't just for looks; its aroma is integral to the eggnog experience.
*
Storage: Homemade eggnog, especially the cooked variety, can be stored in an airtight container in the refrigerator for up to 3-4 days. Alcohol acts as a preservative, potentially extending the shelf life a little longer.
Embrace the joy of crafting your own easy
creamy eggnog recipe this holiday season. Whether you opt for a spiked celebratory drink or a comforting non-alcoholic treat, the rich, smooth, and utterly delicious result will undoubtedly become a cherished part of your festive traditions. Get ready to impress your loved ones and savour every single, delightful sip!